Twitch is the perfect place for the world’s best gamers to share their favorite video games, tutorials, and other entertainment. Increasingly popular among gamers and content creators. There are often memorable moments that viewers want to catch, but because video content is live, it’s often difficult. The term “clipping” (like Twitch) can be a bit confusing if you’re new to the platform.
From time to time, Twitch broadcasts live games to share great moments that you want to cherish forever! Clips let you create short video snippets (or clips) of what you’re watching on Twitch. You can also edit the image. This means you can define the moment you want to capture. we privodes easy and working ways to Check Twitch Chat Logs & Watch Twitch on Roku check now.
How to Clip On Twitch ( Android, and iOS )?
With the Twitch app installed on your iPhone or Android smartphone, you can capture, cut and share videos just like you would on your PC. But if you want, you can share it before making any changes.
- Start live or previous broadcast

- If you want to trim something, quickly tap the video and then tap the trim icon in the top right corner of the panel.
- You have two options. You can instantly share 30 seconds of footage using the share options at the bottom of the Create Clip screen.

- Alternatively, you can click Preview and Edit to trim the video clip. Suppose you choose the latter.
Note: Twitch will automatically post a 30-second clip of him when you share or exit the clip creation screen.
- Click the cut clip. Follow this to trim the video using the handles on the timeline. Click Done to confirm your changes.

- Name your clip and click Publish.

- Return to the clip creation screen in step 3. Select Share Clip to send a link to the clip via your device’s instant messaging app.
Select Share on Whisper if you want to share the video via Twitch’s built-in chat service. Or press Copy link to copy the clip link to your clipboard.
How to Clip-on Twitch in a Web Browser?
You can create Twitch clips in your web browser. Not every Twitch streamer allows you to do this, so if you can’t create a clip, that could be the reason. Some Twitch channels require you to subscribe to enable Twitch clipping.
To clip on Twitch using PC or Mac:
You can create Twitch clips in your web browser. Not all his Twitch players allow this, so if you can’t make clips, this might be the reason. Some of his Twitch channels require registration to enable Twitch clipping.
- Stream on Twitch using your PC or Mac.
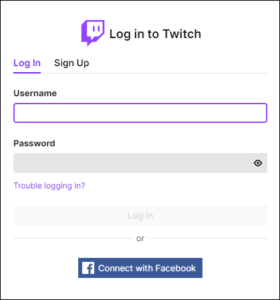
- Open the Twitch website and log in.
- Upload your live or recorded stream to Twitch.
- For recorded Twitch streams, navigate to the location of the video you want to record.
- Move the video and play it halfway.

- Click the Crop button (bottom right) or press Alt+X (Windows) or Option+X (Mac).

- Move the slider blue control to select a recording duration from 5 seconds to 60 seconds (step 1).

- Enter the department name in the field.

- Click Publish to save the clip.

- To share your clip, copy the clip URL or tap one of the social media icons.
How to delete Twitch clips?
When you create a clip on Twitch, it’s stored in your Clips folder and can be deleted from there. However, if you posted the clip on someone’s website or social media, we recommend that you remove it. To delete a clip posted on Twitch, follow these steps:
- Visit his website on Twitch.
- On your home page, click the Sign In button in the upper right corner of your browser window.
- Click the icon in the corner.

- Select the Creator Dashboard from the dropdown menu.

- On the left side of the screen, click the arrow next to Content to expand the section and select Clips.

- From the Clip menu, check the box next to the clip you want to remove.

- Once done, click the selected Delete button to remove the video from Twitch. of the button.

- Click the Delete button to confirm your selection.
How to manage clips on Twitch?
Twitch has a special section where you can manage all clips created by you and your channel users.
To manage your clips in the Twitch app, you can:
- Tap the “hamburger” icon to open the in-app dashboard.
- Click the title to go to the clip.
- Click Clip Manager to manage your clips.
- You can find “My Clips” and “My Channel Clips” separately.
- You can filter, sort, and retrieve clips based on engagement, activity, and many other parameters. This makes it easier for Twitch creators to manage, optimize, and improve them.
we have a working detailed guide on Activate Starz on Roku & Install, Activate & Watch CNN Go on Roku.
How to Find and Download Clips from Twitch?
If you want to download your own clips, this is only possible for desktop users of his Twitch. Here’s what the home page does:
- Click on his profile icon in the upper right corner of the screen.
- Go to your Creator Dashboard.
- Select the Content icon in the left column and select Clips from the dropdown menu.
- All currently saved clips are displayed. Click on the specific clip you want to download.
- Select the Share button (up arrow icon).
- A pop-up bar appears with a purple icon and an arrow on the line. Click
- The file will be downloaded to your computer in his MP4 format and ready for sharing on Twitter, YouTube, etc.
- Please note that content clipped by Twitch does not belong to you. Copyright belongs to the broadcaster and his Twitch.
Frequently Asked Questions
How to capture more than 30 seconds on Twitch?
Go to the broadcast channel where you want to create the clip. Click the bend icon when you navigate to the live or archived show you want to edit. Create a final 90-second clip. You can edit this to create clips from 5 to 60 seconds.
Is your tweet clip only 30 seconds long?
Starting today, it is available to all users. Clip Trim makes it easy to share your favorite tweet moments. When creating the clip, press the Edit button to shorten the clip to 10 seconds or extend the length of the clip to 40 seconds.
What happens when I edit something on Twitch?
When you create a clip on Twitch, it’s stored in your Clips folder and can be deleted from there. But when you post a clip to someone’s activity board or social media, it depends on who sent it.
Why can’t I cut on Twitch?
Adjust the settings to suit your personal taste. To enable clip-only followers, use the Allow Clipping option now. If your viewers don’t click on your channel, this particular setting may be the culprit. Sign out and return to your Twitch account.
Read more articles:
Conclusion
Now that you have a quick guide to hacking Twitch, the process is easy and you can capture amazing clips you would otherwise miss. If you have any questions about the process, feel free to ask us in the comments section below.